Chocolate Chip Cookies

we think Everyone needs to have a classic chocolate chip cookie recipe. And one that can be adjusted and made to fit your personal cookie style preference. Here at Ctk we love a thick and chewy cookie, but we also recognize that not everyone does and some people want a flatter crispier cookie. we are here to give you one recipe and ways to make the exact cookie you want.
As this recipe is perfected we will make notes of that and update this post. When that happens we will also post on our social media so you can stay in the loop on all new cookie news. Which is really the only kind of news we are interested in.
CHOCOLATE CHIP COOKIES
1 c. butter
1/ 1/2 c. brown sugar
1/2 c. white sugar
2 eggs
1 tsp vanilla
1 tsp baking soda
1/2 tsp salt
2 TBSP cornstarch
3 c. packed flour
1 1/2 c. chocolate chips (we always use a combination of dark and semi sweet chips)
Whisk together butter and sugars until smooth and incorporated. Whisk in eggs and vanilla. Add in baking soda, cornstarch, salt, and flour. Mix well until all flour is incorporated and dough is smooth. Stir in chocolate chips. We like to chop up the chips slightly ensuring plenty of chocolate in each bite.
For the basic instructions of this recipe it will all remain nearly the same. The differences are going to come in the temperature of butter you begin with and the amount of time the dough is chilled before baking.
Refer to pictures below to pick your favorite out and decide which to make!
The warmer your butter is at the beginning will usually mean your cookies will spread more while baking because the dough is already warm…ish. Chilling will allow the dough to set up and the cookies won’t spread as much. Just baking longer doesn’t always guarantee a crispier cookie. If your dough is dense and doesn’t spread it may just mean you burn the bottom and the top is just right. Here is what we have learned from testing this particular chocolate chip cookie recipe.
When dough was chilled, it was first scooped into balls and then refrigerated. No one has time to fight with scooping cold dough.
All tested methods were baked in a 350 degree oven and scooped with a large 2 TBSP cookie scoop.
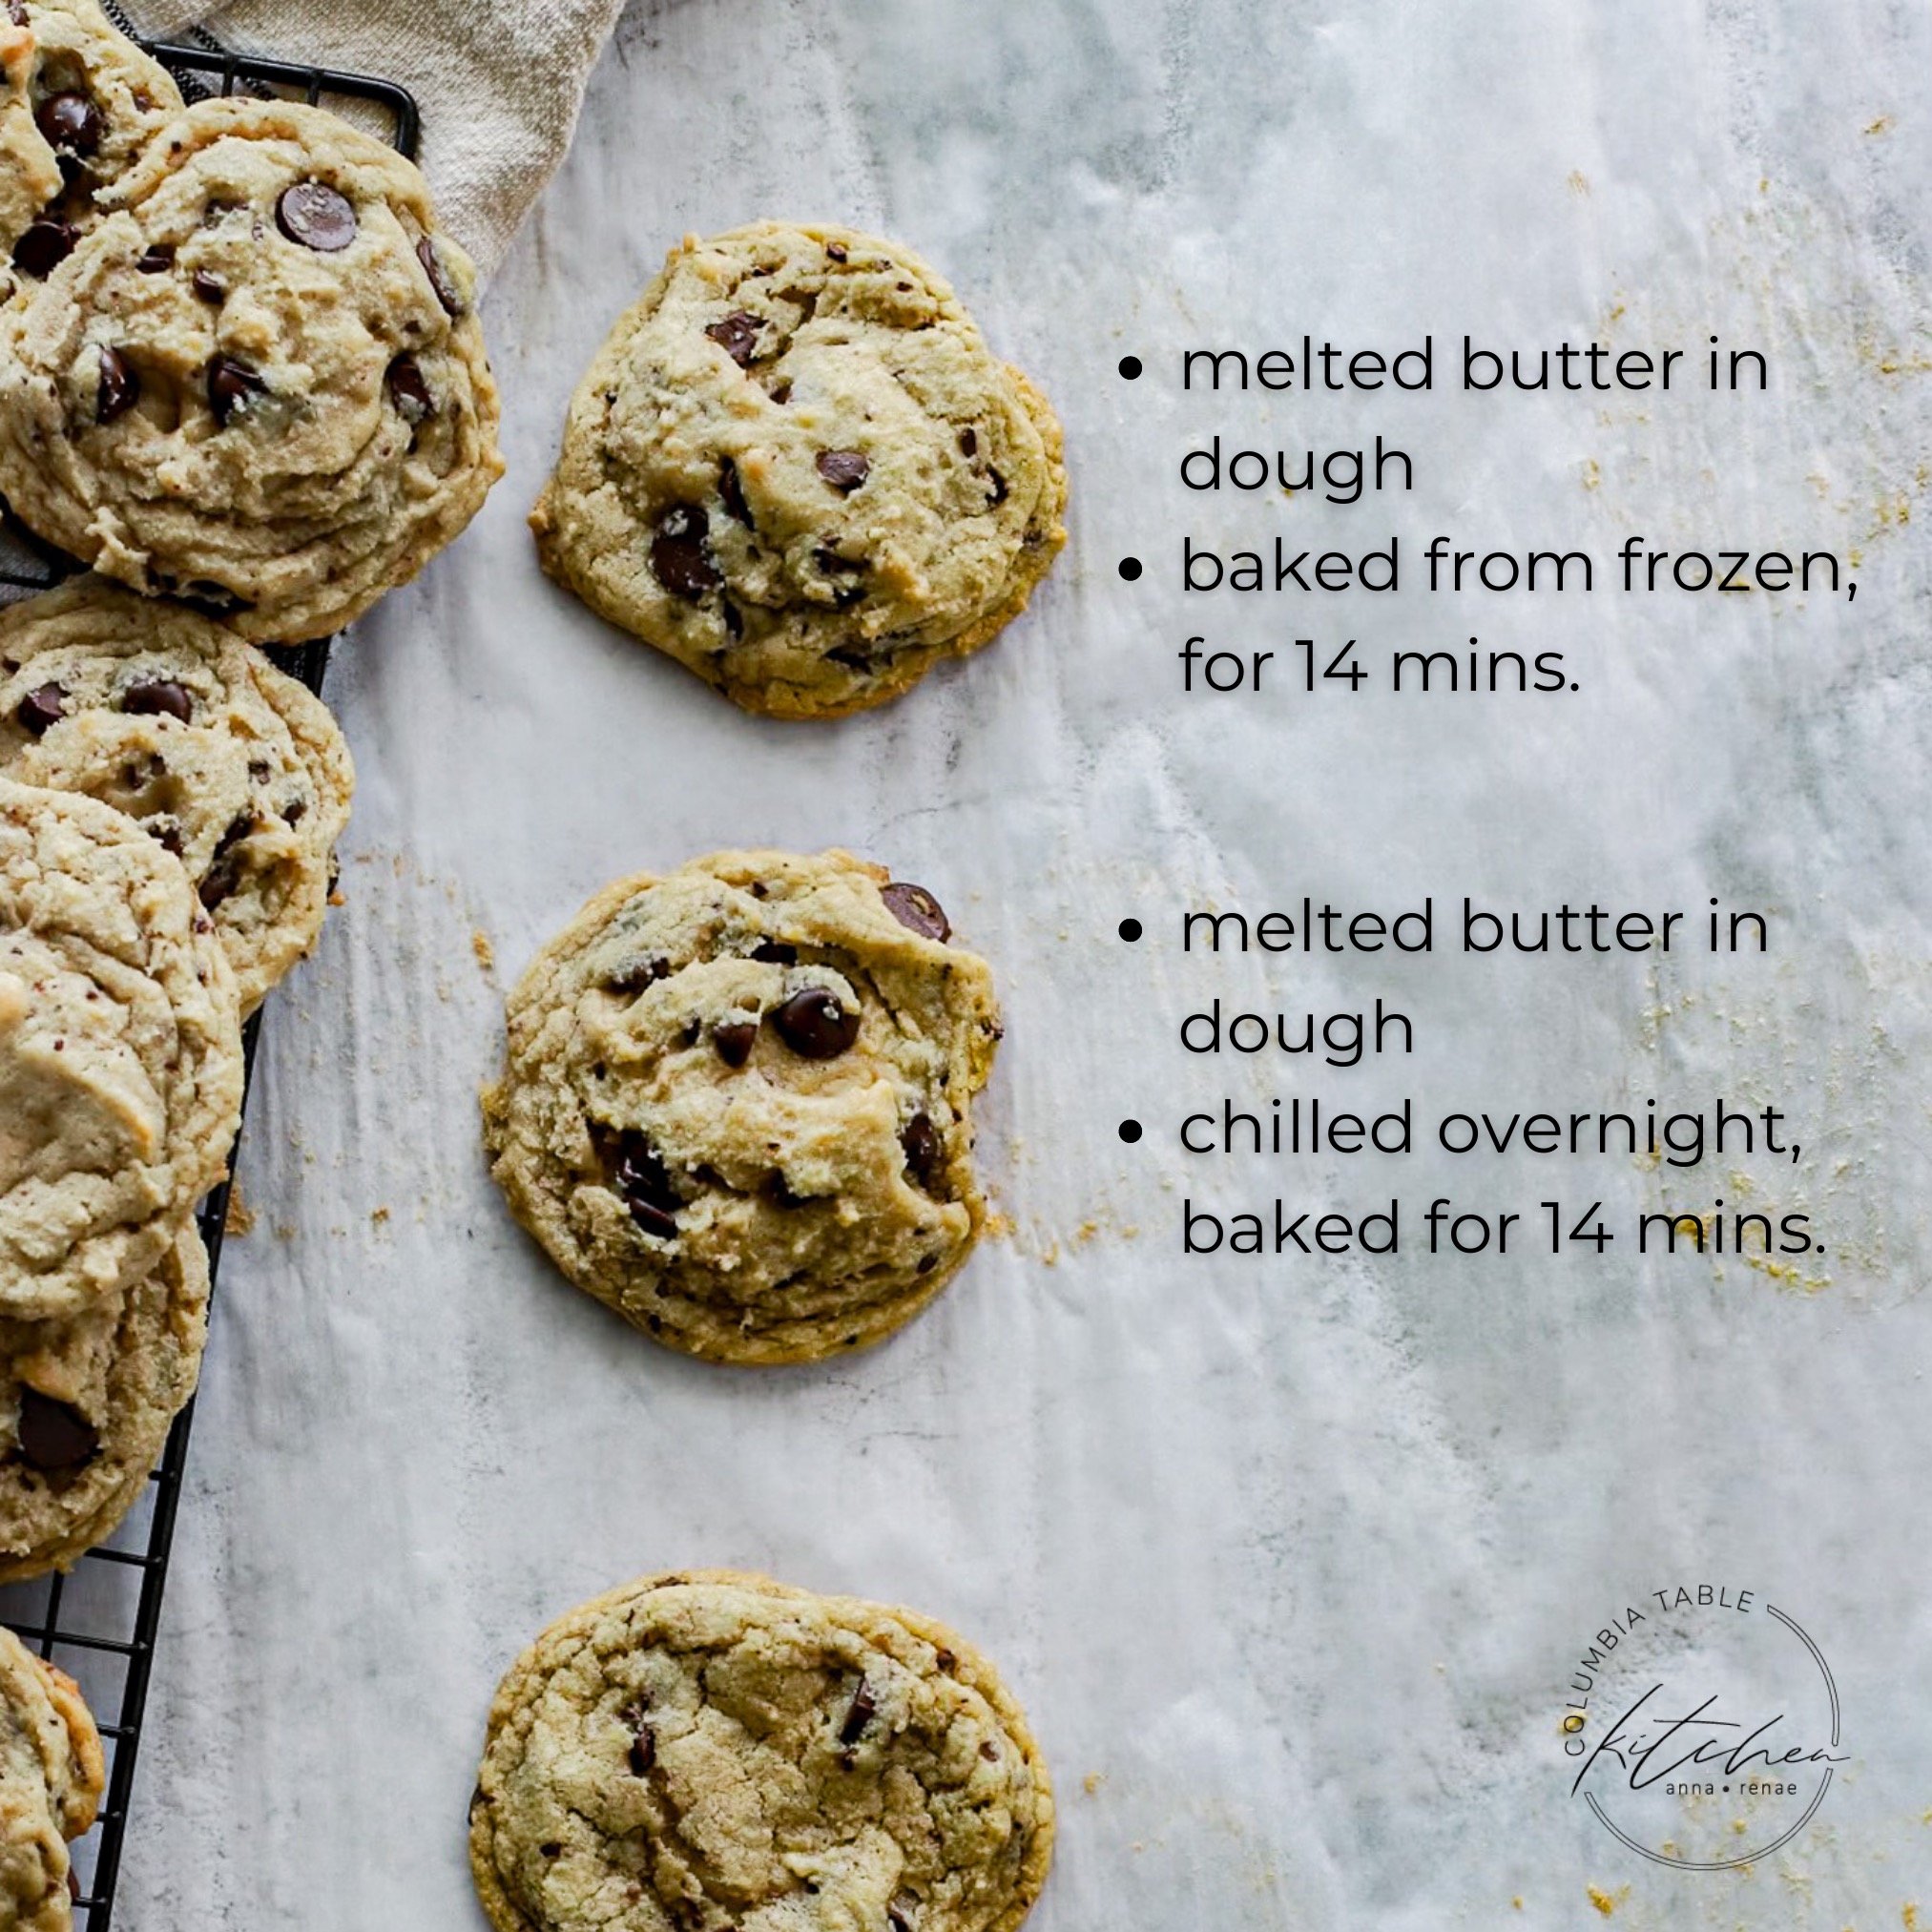
Melted butter: Chilled overnight and baked for 14ish minutes yielded a tall cookie. The edges were still able be golden brown and crispy. (This was Anna’s favorite batch.)
Melted butter: Chilled for an hour and baked for 13 minutes wasn’t quite as tall as above cookie and the edges were able to get crispier.
Softened butter: Not chilled and baked for 13 minutes made the thinnest cookie with the most amount of crisp on the edge. If you prefer a cookie with more crunch, this would be your best option. Bake just a few minutes longer than stated.
This dough is also great for scooping out onto parchment paper and freezing. Once cookie dough balls are frozen, seal in a ziploc bag and bake when needed. Personally the cookies baked from frozen are some our favorite!

each of these batches of dough were cooked to about the same “doneness”. Crisp edges with a soft center. As we tried to show in the pictures is that with each change of temperature you can achieve a different style of cookie from a tall cooke to a flat cookie.
One other tip that was given to us and that Anna really loves to use is using half butter and half butter flavored shortening. Some recipes include shortening, but if it doesn’t she highly recommends trying this!
Save recipe title to your Pinterest for later.
Find more of our favorite recipes here.